Step-by-Step Guide to Installing a Kitchen Backsplash
Many people struggle with installing a kitchen backsplash, unsure of where to start or how to get that perfect, professional look. You’re not alone—it’s a common DIY project that can feel overwhelming at first.
But with a little guidance, you can transform your kitchen with a beautiful backsplash that matches your style.
To install a kitchen backsplash, start by choosing a suitable material like ceramic, glass, or stone based on your style and needs. Measure your space carefully, plan your layout, and prepare the walls by cleaning and priming.
Cut tiles as needed, then apply adhesive and place the tiles with spacers, ensuring everything lines up perfectly.
Finish with grout, seal edges, and clean up excess. For more detailed steps and tips, keep exploring the process further.
Key Takeaways
- Choose a suitable backsplash material based on style, durability, and budget.
- Measure and plan your layout. Don’t forget to consider outlets and pattern design.
- Prepare walls by cleaning, repairing, and priming to ensure good adhesion.
- Cut tiles accurately. Then, install them with adhesive and grout.
- Seal the edges for a professional look.
- Keep up with regular maintenance to keep your backsplash looking great.
- Know when to call in a professional, especially for complex tasks or tricky cuts.
How to Choose the Best Backsplash Material for Your Kitchen
Choosing the right backsplash material is key for both style and durability in your kitchen. Think about how much use and splashes your space will get.
If you cook often, go for materials that resist stains and heat, like ceramic or porcelain tiles. For a modern look, glass backsplashes add brightness and are easy to clean.
If you want a natural feel, try stone or granite. Just remember, they may need more maintenance. Budget also matters—tile options range from affordable ceramics to high-end mosaics.
Consider your overall kitchen style and existing countertops. The best material balances practicality with aesthetics, making sure your backsplash looks great and holds up to daily wear.
Measuring Your Space and Planning Your Backsplash Layout
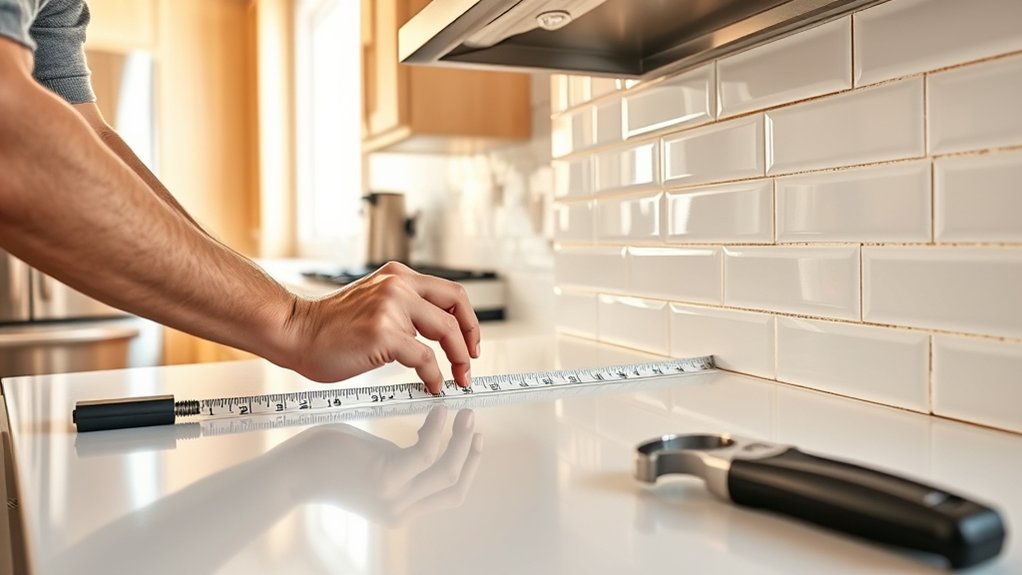
Before you start installing your backsplash, it’s important to measure your space accurately and plan your layout carefully. Use a tape measure to find the width and height of the area you want to cover.
Write down these measurements and consider adding a few extra inches to account for cuts and adjustments. Decide on your preferred pattern, like a grid, herringbone, or running bond.
Sketch your design on paper, noting the measurements and where you plan to place the tiles. Think about outlets, switches, and other features, and plan for cuts around them.
Good planning helps ensure you won’t run out of materials or face surprises during installation. Accurate measurements and thoughtful layout planning make the process smoother and give you a professional-looking backsplash.
Preparing Walls: Cleaning and Priming for Better Adhesion
To guarantee your backsplash adheres securely and looks professional, thoroughly clean and prime your walls before starting installation. Begin by removing any grease, dust, or dirt using a mild cleaner or vinegar solution. Rinse the surface well and let it dry completely.
This step ensures no residues interfere with adhesion. Once clean, inspect for holes or uneven patches and sand them smooth. Next, apply a high-quality primer suitable for your wall material, like drywall or tile backer board.
Priming creates a uniform surface, improves adhesion, and prevents moisture issues. Use a brush or roller to cover the entire area evenly, and let the primer dry as recommended by the manufacturer. Proper preparation guarantees your tiles stay in place and look great.
Cutting Tiles and Materials to Fit Your Design
Once your walls are clean and primed, it’s time to measure and cut your tiles and materials to fit your design.
Use a tape measure to find where you need to make cuts, and mark the tiles with a pencil for accuracy. For straight cuts, a tile cutter or wet saw works best; don’t forget to wear safety glasses.
If you need to create openings for outlets or switches, carefully mark those spots. Use a drill to make starter holes, then cut with a saw. Always double-check your measurements before cutting to avoid mistakes.
Keep spare tiles or materials nearby in case something breaks. Precise cutting helps ensure a seamless fit and a professional-looking backsplash.
Applying Adhesive and Installing Your Backsplash
Before applying the adhesive, make sure your surface is clean, dry, and smooth. Spread the adhesive evenly on the wall. Then carefully place your backsplash tiles, pressing firmly to secure them.
Keep an eye on the alignment as you work to ensure a professional-looking result.
Preparing the Surface
Start by thoroughly cleaning the wall surface where you’ll install your backsplash to guarantee proper adhesion. Remove any grease, dust, or debris with a mild cleaner or soap and water. Use a sponge or cloth to wipe the area and dry it completely.
Check for any uneven spots or holes and fill them with spackle or patching compound, then sand smooth once dry. Confirm the surface is flat and smooth to prevent tiles from cracking or slipping.
If your wall has a glossy finish, lightly sand it to improve adhesion. Remove any loose paint or wallpaper. Taking these steps assures your surface is clean, even, and ready for the adhesive, which helps your backsplash stay securely in place for years to come.
Applying the Adhesive
Apply the adhesive evenly to the back of each tile or on the wall using a notched trowel. Hold the trowel at a 45-degree angle to create consistent ridges, which helps ensure even coverage.
When working with tiles, spread the adhesive in small sections so it doesn’t dry out before you place the tile. If you’re applying directly to the wall, work in manageable areas to keep a strong bond.
Press each tile firmly into the adhesive, twisting slightly to make sure it contacts fully. Keep an eye on spacing and alignment as you go to get a neat finish.
Don’t use too much adhesive, as this can cause excess squeeze-out. Too little adhesive might lead to poor adhesion, so find a good balance.
Keep your workspace organized and work steadily to achieve a clean, professional look.
Installing the Backsplash
Once you’ve prepared your adhesive and tiles, it’s time to start installing your backsplash. Begin by applying a generous layer of adhesive to the wall with a notched trowel, working in small sections so it doesn’t dry out.
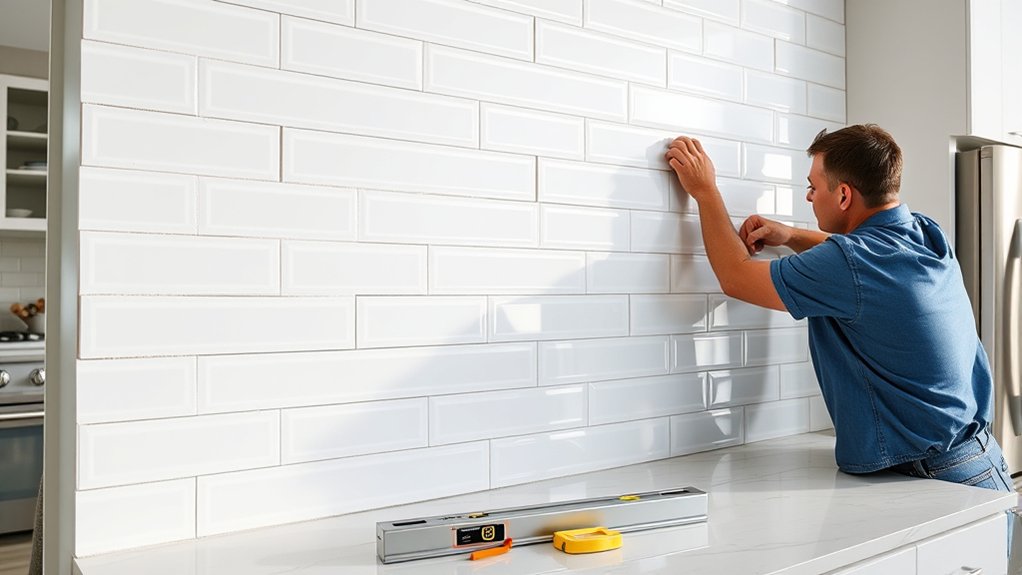
Press each tile firmly into place, starting from your chosen corner or center point, and work outward. Use spacers to keep the gaps between tiles even for a professional look.
Check your alignment often with a level to keep tiles straight. If you need to make adjustments, do so quickly before the adhesive sets. Keep applying adhesive, placing tiles, and adjusting until you’ve covered the entire area.
Take your time to ensure each tile is securely attached and properly aligned before moving on.
Grouting Your Kitchen Backsplash for a Long-Lasting Finish
Grouting your kitchen backsplash is an essential step to guarantee a durable and polished finish. First, prepare your grout according to the manufacturer’s instructions, mixing it to a smooth, peanut butter-like consistency.
Using a rubber float or trowel, spread the grout diagonally across the tiles, pressing it into the joints to fill them completely. Work in small sections to prevent the grout from drying out.
Once the joints are filled, hold a damp sponge at a slight angle and wipe away excess grout from the surface of the tiles. Rinse the sponge frequently to keep it clean.
After about 15-30 minutes, when the grout has set, use a clean, dry cloth to buff the tiles and remove any remaining haze. Proper grouting guarantees your backsplash looks seamless and lasts for years.
Sealing Edges and Corners for a Clean Look
Sealing the edges and corners of your backsplash is key to getting that polished, professional look. Use a good-quality, paintable silicone caulk to fill in gaps where tiles meet walls or cabinets.
Apply the caulk carefully with a caulking gun, making sure to press it into the seams. Smooth out the bead with a damp finger or a finishing tool for a neat, even line.
Pay special attention to corners and edges to stop moisture from getting behind the tiles, which can cause damage over time. Wipe away any excess caulk right away with a damp cloth for a clean finish.
Let the sealant cure fully according to the manufacturer’s instructions before using the area. Proper sealing not only makes your backsplash look better but also helps keep water and dirt out.
Cleaning Up and Perfecting Your Backsplash Finish
After sealing the edges and corners, it’s time to tidy up and perfect your backsplash finish. Start by removing any excess adhesive or grout with a damp cloth before it dries.
Use a soft sponge or cloth to wipe away smudges or residue, making sure your tiles look smooth and clean. Pay close attention to grout lines, ensuring they’re neat and free of excess material.
For a polished look, consider applying a sealant if it’s recommended for your tile type. Here’s a quick overview to help you remember the key steps:
| Step | Tool Needed | Tip |
|---|---|---|
| Remove excess adhesive | Damp cloth | Do this before it dries |
| Wipe tiles | Soft sponge | Use gentle pressure |
| Clean grout lines | Toothbrush or small brush | Scrub gently for neat lines |
| Seal the surface | Tile sealant | For added protection |
| Final wipe | Dry cloth | Achieve a smooth finish |
Common Mistakes to Watch Out for During Installation
One common mistake to watch out for during installation is rushing through the process without double-checking measurements and alignment. It’s tempting to move quickly, but small errors can lead to uneven tiles or gaps. Always measure twice before cutting or applying adhesive.
Use a level or straightedge to guarantee tiles are aligned properly. Neglecting this step can result in a crooked backsplash that’s tough to fix later. Also, avoid rushing the adhesive or grout drying times; patience leads to a clean, professional finish.
Don’t skip the layout planning either—visualize your pattern beforehand to prevent awkward cuts or mismatched tiles. Taking your time at each step helps catch mistakes early, saving you time, effort, and frustration down the line.
Tips for Maintaining Your Backsplash Over Time
To keep your backsplash looking great, regular cleaning is key. Use gentle, non-abrasive cleaners to prevent damage and stains.
Taking these simple steps helps preserve its appearance over time.
Regular Cleaning Techniques
Regular cleaning is essential for keeping your backsplash looking fresh and spotless over time. To do this, wipe it down daily with a soft cloth or sponge dampened with warm water.
For stubborn spots or grease, mix a few drops of mild dish soap with water, then gently scrub the surface. Avoid abrasive cleaners or scrub brushes that could scratch or damage the material.
After cleaning, rinse with a clean, damp cloth to remove any soap residue. Dry the surface thoroughly with a soft towel to prevent water spots or streaks.
Regular maintenance prevents buildup and keeps your backsplash shining. By sticking to these simple techniques, you’ll maintain its appearance and prolong its lifespan without much effort.
Preventing Damage and Stains
Maintaining your backsplash’s look over time means taking some proactive steps to prevent damage and stains.
First, make sure to seal the surface regularly. It creates a barrier against moisture and stains, keeping it looking fresh.
Next, always use cutting boards and trivets when cooking. They protect your backsplash from scratches and heat damage.
Be quick to clean spills as soon as they happen. Addressing messes right away helps prevent stains from setting.
Finally, avoid harsh chemicals. Stick to gentle cleaners to keep your backsplash surface in good shape.
When to Hire a Professional for Your Kitchen Backsplash
While installing a backsplash might seem straightforward, there are times when hiring a professional becomes essential to get a flawless finish. If you lack experience with tile cutting, especially around outlets or corners, a pro can help avoid costly mistakes.
When your kitchen has complex layouts or uneven walls, professionals guarantee precise alignment and smooth surfaces. If you’re unsure about waterproofing or proper sealing, hiring an expert ensures durability.
If you’re pressed for time or want a polished look, professionals can complete the job efficiently and neatly. Ultimately, if the project feels overwhelming or involves intricate work, bringing in a backsplash specialist saves you frustration and ensures a professional result.
It’s a worthwhile investment for a seamless, long-lasting kitchen upgrade.
Frequently Asked Questions
How Long Does a Typical Backsplash Installation Take?
A typical backsplash installation takes about one to three days, depending on the size of your kitchen and the complexity of the design.
You’ll spend the first day preparing the surface, measuring, and cutting tiles. The second day involves actual tiling and grouting.
On the final day, you’ll clean up and seal the backsplash. If you work efficiently and have experience, it might take less time.
Beginners could need a bit longer to finish the job.
What Tools Are Essential for DIY Backsplash Installation?
Imagine you’re tackling your backsplash project; essential tools are a tile cutter, notched trowel, level, and spacers. For instance, a homeowner used a wet tile saw to cut tiles precisely, saving time and reducing waste.
You’ll also need a measuring tape, pencil, and adhesive. These tools make the process smoother, helping you achieve professional-looking results and avoid frustration.
Proper tools really make all the difference in your DIY backsplash project.
Can I Install a Backsplash Over Existing Tiles?
Yes, you can install a backsplash over existing tiles, but you’ll need to prepare the surface properly. Clean the tiles thoroughly to remove grease and dirt, then lightly sand them to create a rough surface for better adhesion.
Fill any gaps or cracks with a suitable filler and check that the tiles are in good condition. Applying a primer designed for tiles will help the new backsplash stick securely.
How Do I Remove Old Backsplash Tiles Safely?
Sure, removing old backsplash tiles is a breeze—if you enjoy dust and frustration. Start by turning off the power and protecting your surfaces.
Use a putty knife or a chisel to pry up the tiles carefully, working from one corner. Be patient and gentle to avoid damaging the wall.
What Are Cost-Effective Alternatives to Traditional Tile Backsplashes?
You can save money by choosing peel-and-stick tiles, which are affordable and easy to install without professional help. Paint is another budget-friendly option; use semi-gloss or tile paint for durability.
Consider using beadboard paneling or wallpaper designed for kitchens, both of which add style without the high cost of traditional tiles. These alternatives are quick, inexpensive, and adaptable to your kitchen’s design.
Conclusion
Now that you know the step-by-step process, you’re ready to transform your kitchen with a beautiful backsplash. Remember, “measure twice, cut once,” to avoid mistakes and save time.
Take your time, follow the tips, and don’t hesitate to call in a pro if needed. Patience and care will help you create a stunning focal point that enhances your space and reflects your style.
With your new kitchen backsplash installed, your kitchen will look refreshed and stylish. Enjoy your handiwork and the beautiful update to your space!