7 Essential Steps to Build Your Dream Outdoor Kitchen
Thinking about creating the perfect outdoor kitchen? You’re not alone—many homeowners dream of transforming their backyard into a stylish, functional space, but the process can feel overwhelming.
From planning to execution, building your dream outdoor kitchen involves many steps, and it’s easy to get lost along the way.
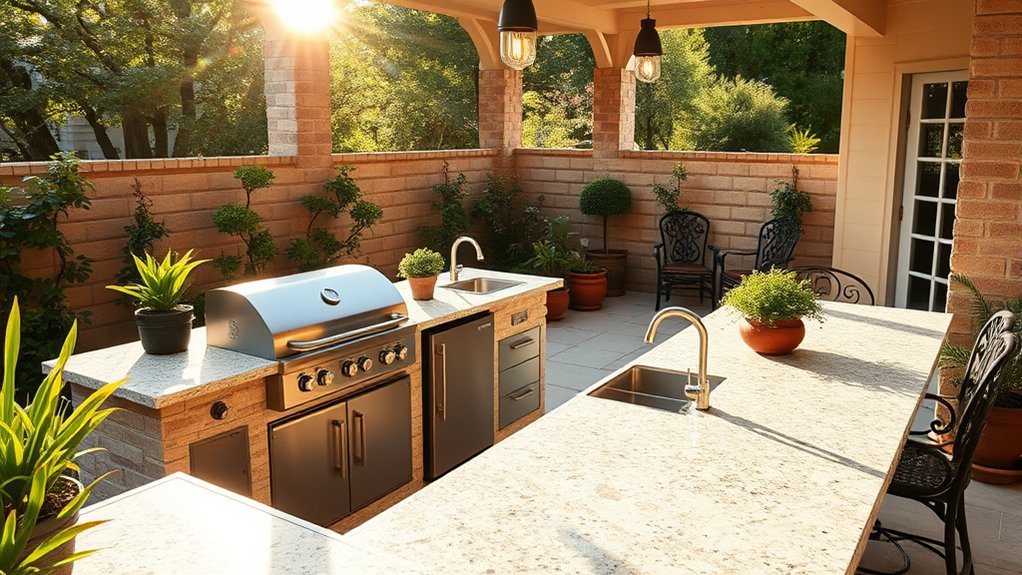
To build your dream outdoor kitchen, start by planning your layout, choosing a location, and selecting durable materials and appliances that match your style.
Set a realistic budget, and make sure you obtain all necessary permits for gas, electrical, and structural work.
Design for comfort with ample counter space and seating, then follow proper installation steps with safety in mind.
Finally, maintain your kitchen regularly and consider upgrades to keep it inviting—continue exploring for detailed tips on each step.
Key Takeaways
- Plan your outdoor kitchen layout, keeping in mind functionality, the appliances you want, and your preferred style. This will help you make the most of your space and ensure a smooth workflow.
- Set a realistic budget that includes permits and site preparation. Focus on prioritizing essential features to keep costs in check.
- Choose durable, weather-resistant materials and energy-efficient appliances. This way, your outdoor kitchen will last longer and be easier to maintain.
- Design for comfort by positioning cooking zones properly, providing enough counter space, and adding seating and shade. Make sure pathways are clear for easy movement.
- Follow good construction practices, prepare the site thoroughly, and plan for regular maintenance. These steps will help keep your outdoor kitchen safe and durable over time.
How to Plan Your Outdoor Kitchen for Functionality and Style
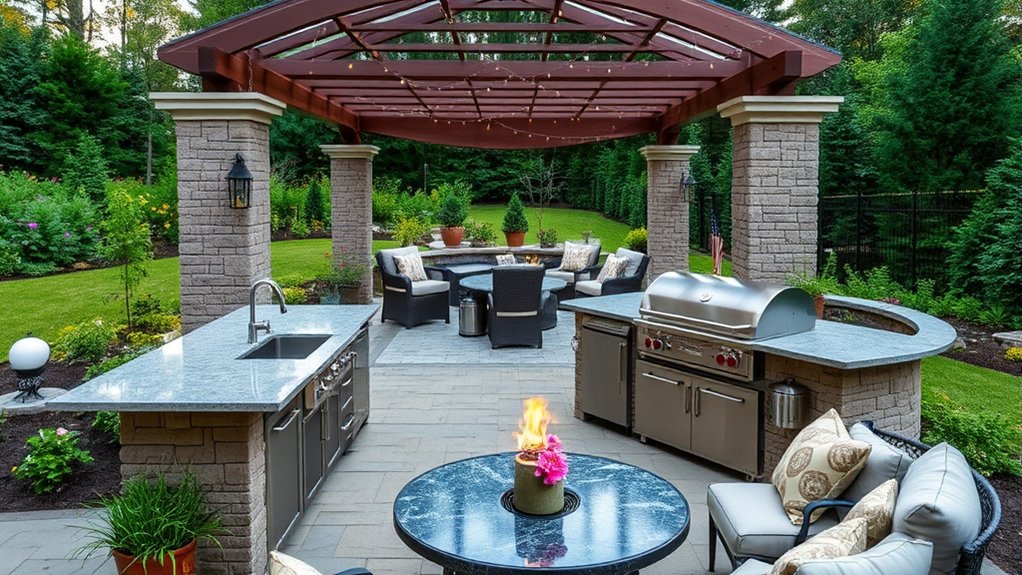
Planning your outdoor kitchen carefully guarantees it’s both functional and stylish. First, think about how you’ll use the space—will you host big gatherings or just enjoy casual meals?
Consider essential appliances like grills, refrigerators, and prep stations, making sure they’re conveniently placed for easy workflow. Pay attention to your layout; a good work triangle makes cooking more efficient.
Arrange grills, fridges, and prep stations for seamless flow and efficient outdoor cooking.
Don’t forget about storage. Ample cabinets and drawers keep clutter out of sight and make everything accessible. When it comes to style, choose durable materials that can withstand the weather and match your look, whether it’s modern, rustic, or coastal.
Lighting is super important for creating ambiance and ensuring safety. Add both task and ambient lights to set the mood and make cooking easier. Lastly, plan for electrical outlets and plumbing early so everything works smoothly and looks cohesive.
How Much Should You Budget for Your Outdoor Kitchen?
Setting a budget for your outdoor kitchen depends on factors like size, materials, and features you want to include.
To make the most of your money, consider smart tips like prioritizing essentials and exploring cost-effective options.
Knowing these points helps ensure your project stays on track financially.
Factors Influencing Cost
The cost of building an outdoor kitchen can vary a lot depending on a few key factors. Your choice of materials really impacts the budget—luxury stone or high-end countertops cost more than basic brick or concrete.
The size of your space also matters. Larger setups need more materials and labor, which can add up quickly. The appliances and features you choose, like built-in grills, refrigerators, or sinks, can also increase the overall cost.
Permits and site preparation are additional expenses to consider. If you go for custom designs or professional installation, expect to pay a premium. On the other hand, DIY projects or simpler setups can help keep costs down.
Understanding these factors helps you set realistic expectations and plan your budget wisely. This way, your outdoor kitchen will meet your needs without overspending.
Budgeting Tips and Tricks
Determining your outdoor kitchen budget depends on a few key factors like size, materials, and features you want.
To plan effectively, check out these typical cost ranges:
| Basic Setup | Mid-Range Features | Luxury Additions |
|---|---|---|
| $3,000-$8,000 | $8,000-$15,000 | $15,000+ |
| Small grill, simple countertops | Upgraded appliances, island seating | High-end appliances, custom cabinetry |
| Basic lighting, minimal decor | Ambient lighting, upgraded fixtures | Outdoor TV, fire features, premium finishes |
Knowing these categories helps you allocate funds smartly.
Start with the essentials, then add upgrades as your budget allows. Staying flexible guarantees your outdoor kitchen matches your dreams without breaking the bank.
How to Choose Durable Materials and Appliances
When selecting materials and appliances for your outdoor kitchen, prioritize weather-resistant options like stainless steel, concrete, or stone to withstand the elements.
Look for energy-efficient appliances to save on long-term costs and reduce your environmental impact.
Choosing durable, smartly selected components guarantees your outdoor space remains functional and stylish for years to come.
Weather-Resistant Material Options
Choosing weather-resistant materials is key to making sure your outdoor kitchen stands up to the elements over time. Pick durable options that resist moisture, UV rays, and temperature changes.
Here are four top materials to consider:
- Stainless Steel: Great for appliances and fixtures. It resists rust and corrosion, so it stays looking good.
- Natural Stone or Concrete: Perfect for countertops. They handle weather changes well and are easy to maintain.
- Porcelain or Ceramic Tiles: Ideal for backsplashes and flooring. They’re resistant to moisture and staining.
- Teak or Synthetic Wood: Good for furniture. Natural teak withstands weather, while synthetic options are low maintenance.
Energy-Efficient Appliance Selection
Selecting appliances that are both durable and energy-efficient guarantees your outdoor kitchen remains functional and cost-effective over time. Look for models with high Energy Star ratings because they use less electricity and water, saving you money on utility bills.
When choosing appliances like grills, refrigerators, and lighting, prioritize those made from quality, weather-resistant materials to withstand outdoor conditions. Consider features that promote efficiency, such as smart controls or low-energy modes.
Durable construction ensures your appliances last longer, reducing replacement costs and maintenance. Proper insulation and ventilation can also boost energy savings.
How to Design Your Outdoor Kitchen for Comfort and Convenience
Designing your outdoor kitchen for comfort and convenience starts with careful layout planning. You want everything within easy reach to make cooking and socializing smoother.
First, position your grill, prep station, and sink in a logical triangle to reduce unnecessary movement. This setup keeps everything you need close at hand.
Next, make sure there’s enough counter space on either side of appliances for prep work and plating. It helps keep your workflow seamless and clutter-free.
Ensure ample counter space on both sides of appliances for smooth prep and plating.
Include seating areas nearby but not blocking access to the cooking zones. This way, you can enjoy conversations without getting in the way of cooking.
Also, plan for shade and weather protection. It makes your outdoor kitchen more comfortable during long, sunny or rainy days.
Think about traffic flow and avoid cluttering pathways. Keeping your space organized makes everything safer and easier to navigate.
Prioritize functional zones and keep frequently used items close. That way, you won’t have to hunt for essentials while cooking or entertaining.
A well-thought-out layout makes your outdoor kitchen enjoyable, practical, and welcoming for everyone.
What Permits and Building Codes Do You Need to Know?
Are you aware of the permits and building codes needed for your outdoor kitchen? Skipping these steps can lead to fines or having to make costly modifications later.
Before you start, check with your city or county to find out what’s required. Usually, you’ll need permits for gas lines, electrical work, or structural additions.
Building codes are there to keep your project safe and durable. They cover things like setbacks, fire safety, and material standards to ensure everything is up to code.
| Permit Type | Purpose |
|---|---|
| Building Permit | Ensures structural safety and compliance |
| Electrical Permit | Covers wiring, outlets, and lighting installation |
| Gas Permit | Regulates gas line installation and safety |
| Zoning Permit | Confirms your project fits local land use rules |
How to Install Your Outdoor Kitchen Step by Step
Building your outdoor kitchen step by step can seem overwhelming, but breaking it down makes the process manageable. First, choose the layout and design that fit your space and needs.
Next, prepare the foundation by leveling the ground and setting a sturdy base. Then, follow these key steps:
- Install the framing and structural supports.
- Connect utilities like electricity, gas, and water safely.
- Build or assemble the cabinets, countertops, and appliances.
- Finish with sealing, weatherproofing, and final inspections.
Stay organized by completing each step thoroughly before moving to the next. Use proper tools and follow safety guidelines, especially when working with utilities. Taking your time guarantees a durable, functional outdoor kitchen you’ll enjoy for years.
How to Maintain and Enhance Your Outdoor Cooking Space
Maintaining and improving your outdoor cooking space keeps it functional and inviting for years to come. Regularly clean your grill, countertops, and appliances to prevent buildup and ensure safety.
Cover equipment when not in use to protect it from weather damage. Check for rust, loose fittings, or cracks, and repair them promptly.
Enhance your space by adding comfortable seating, ambient lighting, or new accessories to keep it fresh and useful. Consider updating storage solutions to stay organized and avoid clutter.
Keep plants healthy and maintain a tidy landscape to boost the overall look. Periodic upgrades like new tiles or a fresh coat of paint can give your space a quick refresh.
Consistent care and thoughtful updates make sure your outdoor kitchen remains a welcoming, efficient spot for cooking and gatherings.
Frequently Asked Questions
What Are the Latest Trends in Outdoor Kitchen Design?
You’ll notice outdoor kitchen designs are leaning toward seamless integration with nature, using natural materials like stone and wood. Technology plays a big role, with smart appliances and built-in lighting creating ambiance and convenience.
You might also see more modular setups for flexibility and multi-functional spaces that combine cooking, dining, and lounging areas. Incorporating eco-friendly features, such as solar-powered lighting and sustainable materials, is also trending for a greener outdoor experience.
How Can I Maximize Storage in My Outdoor Kitchen?
Did you know that efficient storage is a top priority for 78% of outdoor kitchen owners? To make the most of your space, try built-in cabinets and drawers that use vertical space effectively.
Choose weatherproof materials to ensure your storage lasts through the seasons. Multi-functional furniture like benches with hidden compartments can also help keep things organized and accessible.
Keep your most-used items within easy reach, and use hooks or racks to organize tools. This way, your outdoor kitchen stays tidy and ready for entertaining at a moment’s notice.
What Are Common Mistakes to Avoid During Installation?
You should avoid rushing the installation process and neglecting detailed planning. Taking your time helps prevent mistakes and makes everything go more smoothly.
Make sure to double-check measurements before cutting or installing fixtures to avoid errors. It’s a simple step that can save you from costly rework later.
Don’t overlook proper electrical and plumbing connections, as this can cause safety issues down the line. Safety should always come first.
Also, steer clear of choosing materials that aren’t weather-resistant or suitable for outdoor use. Using the right materials ensures your project lasts.
Keep a detailed checklist, follow manufacturer instructions, and consider hiring professionals for complex tasks. This way, you’ll have a smoother, mistake-free installation.
How Do I Ensure Safety in My Outdoor Cooking Area?
To guarantee safety in your outdoor cooking area, start by installing your grill and appliances on a stable, non-combustible surface away from flammable materials.
Keep a fire extinguisher nearby and ensure proper ventilation to prevent smoke buildup.
Regularly inspect gas lines and electrical connections for leaks or damage.
Also, establish a clear, clutter-free zone to prevent trips and accidents, and educate everyone on safe usage practices.
What Are Eco-Friendly Options for Outdoor Kitchen Appliances?
You can choose eco-friendly outdoor kitchen appliances by selecting those with ENERGY STAR ratings, which guarantee energy efficiency. Look for solar-powered lights, energy-efficient grills, and composting appliances to help reduce your carbon footprint.
Opt for appliances made from sustainable materials like recycled steel or responsibly sourced wood. These choices support environmentally friendly practices and reduce waste.
Additionally, consider using propane or natural gas options instead of charcoal. They produce fewer emissions and are generally more eco-friendly.
Conclusion
Imagine stepping into your backyard, the aroma of grilled favorites filling the air as warm sunlight dances on your outdoor oasis. With these seven steps, you’ll transform your space into a stunning, functional haven.
From planning and budgeting to installation and maintenance, each detail brings you closer to your dream outdoor kitchen. Soon, you’ll be hosting unforgettable gatherings surrounded by the beauty of your personalized retreat.
This is where every meal feels like a celebration under the open sky. Building your dream outdoor kitchen is easier than you think when you follow these essential steps.