How Long to Pressure Cook Roast Beef Step by Step
Many home cooks struggle with getting roast beef just right—tender, juicy, and perfectly cooked every time.
If you’re using a pressure cooker, you’re not alone; it can be tricky to find the perfect timing without overcooking or undercooking your meat.
For a tender roast beef in a pressure cooker, cook 1 to 1.5-inch thick cuts for 20-25 minutes.
Larger, over 2 inches thick, should be cooked for 30-40 minutes.
Make sure to sear your meat first and add enough liquid for proper steam.
Avoid overcooking by monitoring the time closely, and let the pressure release naturally to keep the meat juicy.
Stick around to uncover tips that will help you perfect your technique.
Key Takeaways
- Use tough, well-marbled cuts like chuck or brisket for the best results under pressure.
- Sear the beef for 2–3 minutes per side before pressure cooking. This helps boost the flavor and gives it a nice crust.
- For thinner cuts, about 1 to 1.5 inches thick, cook for 20–25 minutes. If your cut is larger, over 2 inches, aim for 30–40 minutes.
- Set your pressure cooker to high pressure. Let it naturally release pressure after cooking to keep the meat tender.
- Once done, rest the beef for 10–15 minutes. This step helps keep it juicy and allows the flavors to settle evenly.
Choosing the Best Roast Beef Cuts for Pressure Cooking
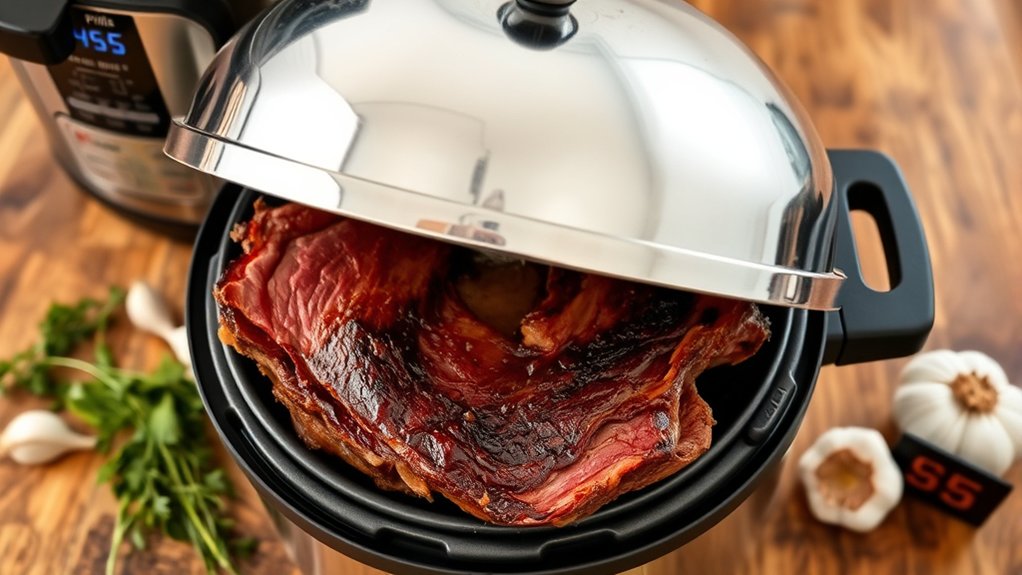
When choosing the best roast beef cuts for pressure cooking, look for tougher, well-marbled options that do well with quick cooking. Cuts like chuck roast, brisket, and round are perfect because their connective tissues and fat break down easily under pressure, making the meat tender and flavorful.
These cuts aren’t ideal for slow roasting, but pressure cooking transforms them into melt-in-your-mouth dishes. Keep an eye out for roasts with visible marbling, as the fat helps keep the meat moist and boosts the flavor.
Avoid lean cuts like sirloin or tenderloin, which can turn dry if cooked too quickly. Picking the right cuts ensures your pressure-cooked roast beef stays juicy, tender, and full of flavor every time.
Getting Your Roast Beef Ready for Pressure Cooking
Before you start cooking, proper preparation of your roast beef guarantees it turns out tender and flavorful. First, take the roast out of the refrigerator and let it sit at room temperature for about 30 minutes. This helps ensure even cooking.
Next, pat the meat dry with paper towels to help it brown better. Season generously with salt, pepper, and any other herbs or spices you like. If you want, you can also marinate the beef for extra flavor.
Trim off any excess fat to prevent greasy results. Finally, sear the roast in a hot skillet for 2–3 minutes per side to develop a rich crust and boost flavor.
Selecting the Ideal Roast Size and Shape for Pressure Cooking
Choosing the right size and shape of your roast is key to even cooking and tender results. Make sure it fits comfortably in your pressure cooker without crowding.
Ideally, the roast should be around 3 to 4 inches thick. This helps it cook evenly and stay tender.
Consider leaner cuts like sirloin or chuck. They respond well to pressure cooking and hold their shape nicely during the process.
Optimal Roast Dimensions
Selecting the right size and shape for your roast guarantees even cooking and ideal pressure cooking results. You want a cut that fits comfortably in your pressure cooker without crowding, so steam can circulate freely.
Aim for a thickness of about 2 to 3 inches to ensure thorough heat penetration. Smaller roasts cook faster and more evenly, reducing the risk of overcooking.
Larger pieces may take more time but can still turn out great if sliced properly afterward. A uniform shape helps maintain consistent temperature distribution.
Keep these tips in mind: choose a cut that fits snugly but isn’t crowded, opt for a thickness of 2–3 inches, and avoid overly thick or irregular shapes.
Selecting smaller, uniform pieces can speed up cooking. Make sure to leave enough space around the roast for steam to circulate freely.
Shape for Even Cooking
The shape of your roast plays a key role in ensuring even cooking under pressure. A uniform, thick cut helps heat penetrate evenly, so you avoid overcooked edges or undercooked centers.
Choose a roast that’s roughly the same width all around. Steer clear of narrow ends or tapered shapes, which can cook unevenly. A square or rectangular shape works best because it makes contact with the heat and steam uniformly.
If your roast is irregularly shaped, try trussing or trimming it to create a more even profile. This helps heat distribute evenly and can cut down on cooking time differences.
Suitable Roast Types
To get the best results when pressure cooking roast beef, pick the right cut and size that fit comfortably in your pressure cooker. Choose tender cuts that cook quickly, like sirloin, round, or chuck.
Smaller or uniform shapes cook more evenly and help prevent overcooking. Aim for roasts that are at least 2 pounds to keep them moist and flavorful.
Avoid large or irregularly shaped cuts, as they won’t cook through evenly. Look for cuts that are between 2 and 4 pounds for the best results.
How Long to Pressure Cook Roast Beef by Size and Thickness
For a perfectly cooked roast beef, the cooking time in a pressure cooker depends heavily on its size and thickness. Thinner cuts or smaller roasts cook faster, usually taking around 20 to 25 minutes for a 2-pound piece that’s 1 to 1.5 inches thick.
Larger or thicker roasts, like a 4-pound cut over 2 inches thick, typically need about 30 to 40 minutes under pressure. Always remember to adjust the cooking time based on the weight and thickness.
Thicker cuts require more time to reach the right tenderness. Use a reliable recipe or chart as a guide, and consider adding a few extra minutes if your roast is particularly dense for even, consistent results.
Using a Pressure Cooker to Achieve Tender Roast Beef
Achieving tender roast beef in a pressure cooker isn’t just about the right cooking time. It’s about using the appliance properly to break down connective tissues and develop rich, juicy results. To get the best tenderness, follow these steps:
First, sear the beef to lock in flavor and improve its texture. This step makes a big difference in the final taste.
Next, make sure to add enough liquid so steam can build up and create pressure. Without enough liquid, the cooker won’t work properly.
Be careful not to overfill the cooker, as too much food can prevent proper pressure buildup. Keep it within the recommended limits.
Set the pressure level correctly, usually high for beef, to ensure it cooks properly. This helps break down the tougher fibers.
Finally, let the pressure release naturally once cooking is done. This slow release helps maintain tenderness and keeps the meat juicy.
Adjusting Cooking Time Based on Roast Shape and Thickness
Your roast’s shape and thickness directly impact how long it needs in the pressure cooker. Thicker cuts take longer to cook through, while thinner or more uniform shapes cook faster.
Adjusting your cooking time based on these factors guarantees perfectly tender results every time. So, keep these differences in mind to get the best possible outcome.
Shape Influences Cooking Time
The shape and thickness of your roast really affect how long it takes to cook, especially with pressure cooking. A thicker or more compact roast takes longer to cook all the way through, while a flatter, thinner cut heats evenly and faster.
The overall volume also plays a role in how quickly heat can penetrate the meat. So, thicker roasts need more time to reach the right temperature.
Flat, wide cuts cook quicker because heat spreads evenly across the surface. Rounded or barrel-shaped roasts might need extra time on the thicker parts to cook through.
Irregular shapes can cause uneven cooking, so you might need to make some adjustments. Uniformly shaped roasts give more consistent results and predictable timing.
Thickness Affects Cook Duration
In pressure cooking roast beef, thickness really affects how long it needs to cook. Thicker cuts take more time to cook through, while thinner ones need less.
Think about the shape and size of your roast when planning. Use this table as a quick guide:
| Roast Thickness | Approximate Cooking Time | Notes |
|---|---|---|
| 1 inch (2.5 cm) | 15-20 minutes | Quick cook, tender results |
| 2 inches (5 cm) | 25-30 minutes | Evenly cooked, juicy |
| 3 inches (7.5 cm) | 35-40 minutes | Needs longer pressure time |
| 4 inches (10 cm) | 45-50 minutes | Thick cut, thorough cook |
| 5+ inches | 55+ minutes | Extended pressure needed |
Adjust the cooking times based on the thickness to get the best tenderness.
Checking Roast Beef for Doneness and Perfecting Your Results
How can you tell when your roast beef is perfectly cooked? You’ll want to check for a few key signs to guarantee tenderness and flavor. First, use a meat thermometer to verify the internal temperature matches your preferred doneness—125°F for rare, 135°F for medium-rare, and 145°F for medium.
Next, observe the color: a juicy, slightly pink center indicates proper cooking. Gently press the meat; it should feel firm yet yielding. Allow the roast to rest for 10 minutes before slicing to redistribute juices.
Finally, check the juices—clear or slightly pink means it’s ready. Keep these tips in mind to achieve consistently perfect results every time.
Mistakes to Avoid When Cooking Roast Beef in a Pressure Cooker
Avoid overcrowding your pressure cooker, as it can lead to uneven cooking and tough meat. Don’t skip the natural release because it helps the beef stay tender and juicy. Staying mindful of these mistakes guarantees perfectly cooked roast beef every time.
Overcrowding the Cooker
Overcrowding the pressure cooker can lead to uneven cooking and longer cook times. When you pack too much meat or ingredients inside, heat and steam don’t circulate properly. This can cause dry edges, undercooked centers, or inconsistent tenderness.
To avoid this, leave enough space around the roast for steam to circulate freely. Don’t fill the cooker beyond the maximum fill line. Using a trivet or rack to lift the meat can help if needed.
If your roast doesn’t fit comfortably, try cutting it into smaller pieces. Make sure the lid seals tightly and isn’t obstructed by packed ingredients. Staying mindful of space guarantees even cooking, tender results, and a quicker process.
Ignoring Natural Release
Once you’ve successfully cooked your roast beef, rushing to open the lid right away can ruin the results. Ignoring natural release causes the pressure to drop too quickly, making the meat tougher and less tender.
When you release pressure suddenly, the juices don’t redistribute properly, leading to dry or stringy beef. Always allow the pressure to come down naturally for at least 10-15 minutes after cooking.
This slow depressurization helps the meat retain its moisture and guarantees even tenderness. Patience here is key; rushing this step compromises the texture and flavor.
Never skip natural release unless your recipe explicitly states otherwise. Taking this extra time ensures a juicy, flavorful roast beef with the perfect, melt-in-your-mouth consistency.
Flavoring and Seasoning Your Roast Beef for Pressure Cooking
Flavoring and seasoning your roast beef creates a tasty base for your pressure-cooked meal. Pick your favorite herbs and spices like garlic, rosemary, thyme, or paprika to add some depth.
Marinate the beef for a few hours or overnight to really boost the flavor. Salt and pepper are essential, but you can also add a splash of soy sauce or Worcestershire sauce for extra umami.
Searing the roast first helps lock in juices and gives you a nice crust. Adding aromatics like onions, carrots, or celery to the pressure cooker can also infuse your beef with more richness.
Getting the seasoning right ensures every bite is full of flavor and satisfaction.
Resting and Serving Your Pressure-Cooked Roast Beef for the Best Flavor
After removing the roast from the pressure cooker, letting it rest is key to getting the best flavor and juiciness. Wrap it loosely with aluminum foil and let it sit for about 10 to 15 minutes.
Resting helps the juices spread evenly throughout the meat, so they don’t spill out when you slice. During this time, the meat keeps cooking a little from residual heat, which makes it more tender.
Take this moment to set up your serving dishes or prepare gravy. Once rested, carve the roast against the grain for maximum tenderness. Serve immediately to enjoy the full flavor and moist texture.
Resting is a simple step that really boosts the overall taste and juiciness of your roast beef, making your pressure-cooked meal truly satisfying.
Troubleshooting Common Pressure Cooker Roast Beef Issues
Troubleshooting common pressure cooker roast beef issues often involves pinpointing specific problems that can affect texture, flavor, and tenderness.
If your roast turns out tough, try cooking it longer or increasing the pressure. Overcooked beef can become mushy, so keep a close eye on your cook time.
If the meat lacks flavor, it’s a good idea to check your seasoning or marinade. For uneven cooking, make sure the beef is cut into even pieces and that your pressure cooker isn’t overcrowded.
Here are some tips:
- Check your cooking time and pressure levels.
- Adjust your seasoning or marinade.
- Use a meat thermometer to check for doneness.
- Cut beef into uniform pieces.
- Let the meat rest before serving.
Addressing these issues will help you get tender, flavorful roast beef every time.
Frequently Asked Questions
Can I Cook Frozen Roast Beef in a Pressure Cooker?
Yes, you can cook frozen roast beef in a pressure cooker. Just add a little extra cooking time—about 50% longer than you would for fresh meat.
Make sure to increase the pressure cooking time accordingly and add enough liquid to create steam. Keep in mind that the meat may take longer to come to pressure, so plan ahead.
Always check for doneness and verify the internal temperature reaches safe levels before serving.
What Is the Best Pressure Setting for Roast Beef?
Did you know that pressure cookers can cut cooking time by up to 70%? For roast beef, the best pressure setting is usually high, around 15 psi, which is standard for most models.
This setting helps make your beef tender while keeping the flavor intact. Use high pressure for a juicy, perfectly cooked roast. If you want a slightly softer texture or are using a leaner cut, feel free to adjust the pressure accordingly.
How Do I Prevent Overcooking in a Pressure Cooker?
To prevent overcooking in a pressure cooker, always stick to the recommended cooking times for your specific cut.
Use a reliable timer and avoid opening the lid too early, as this can ruin the process.
Adjust cooking times based on the size of your roast, and try to use natural pressure release when you can.
Check the internal temperature with a meat thermometer to make sure it’s cooked just right without overdoing it.
Can I Use a Slow Cooker Instead of a Pressure Cooker?
A bird in the hand is worth two in the bush, so yes, you can use a slow cooker instead of a pressure cooker. Keep in mind, it takes longer—usually 6 to 8 hours on low—to get tender, flavorful roast beef.
Slow cooking lets flavors develop gradually, but it won’t match the speed of pressure cooking. Adjust your recipe accordingly, and enjoy that tender result!
How Do I Store Leftover Pressure-Cooked Roast Beef?
You should store leftover pressure-cooked roast beef in an airtight container or tightly wrap it with foil or plastic wrap. Keep it in the refrigerator, ideally within two hours of cooking, and plan to eat it within 3-4 days.
For longer storage, freeze the leftovers in a freezer-safe container or bag. Be sure to label it with the date so you know how long it’s been there.
When you’re ready to eat it again, reheat thoroughly to make sure it’s safe to enjoy.
Conclusion
Now that you know how to choose, prepare, cook, and season your roast beef, you’re ready to master the pressure cooker.
With patience, precision, and a little practice, you’ll turn tough cuts into tender, flavorful meals. Trust your instincts, follow the steps, and enjoy the delicious results.
Remember, the key is in the details, the timing, and the love you put into each step. When pressure cooking roast beef, knowing the right cook time is essential for perfect results.
Happy cooking and even happier eating!