DIY Guide to Build a Mud Kitchen for Kids
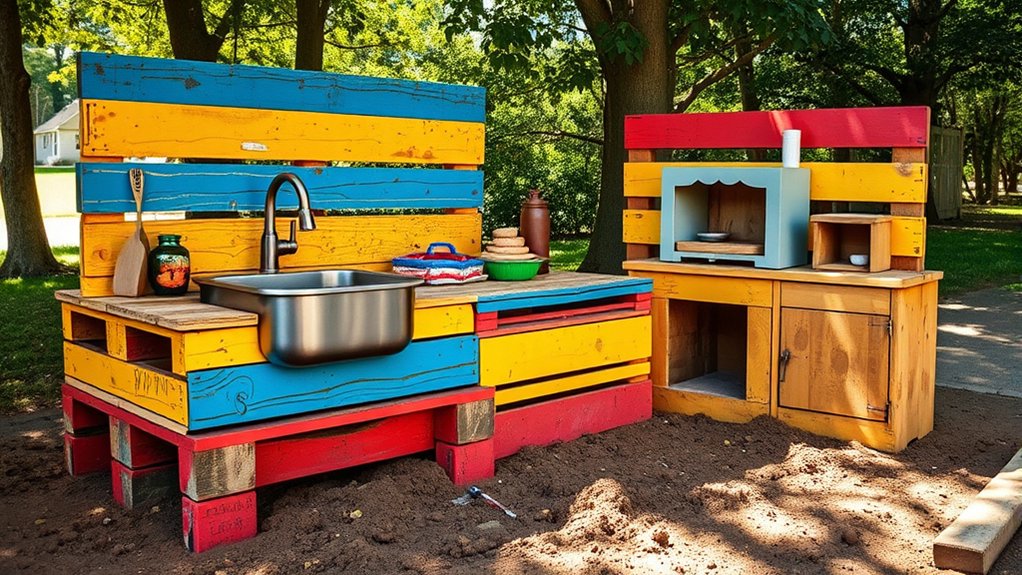
Many parents want to encourage outdoor play and creativity but struggle with finding fun, safe, and affordable ways to do so. Building a mud kitchen for kids is a fantastic DIY project that can transform your backyard into a playful paradise.
To build a mud kitchen for kids, start by choosing a safe, flat spot with some shade and easy access. Gather weather-resistant wood, screws, and child-friendly tools like buckets and spoons.
Assemble the frame with smooth edges and add fun touches such as shelves, a DIY sink, and colorful decorations. Regularly check for safety and keep it clean for ongoing fun.
Keep exploring to uncover tips on enhancing and maintaining this outdoor play space.
Key Takeaways
- Select a safe, flat location with shade and easy access near the play area.
- Gather weather-resistant materials, child-friendly tools, and safety gear for construction.
Build with smooth, rounded edges to keep everything safe for kids.
Make sure the structure is stable and easy for children to reach and use.
Add some personal touches like colorful accessories, signs, and themed decorations.
This will make the mud kitchen more fun and inviting for the little ones.
Regularly check the kitchen for any issues, clean it often, and add natural elements.
These steps help keep it safe and make playtime even more enjoyable.
Why Building a Mud Kitchen Sparks Kids’ Imagination
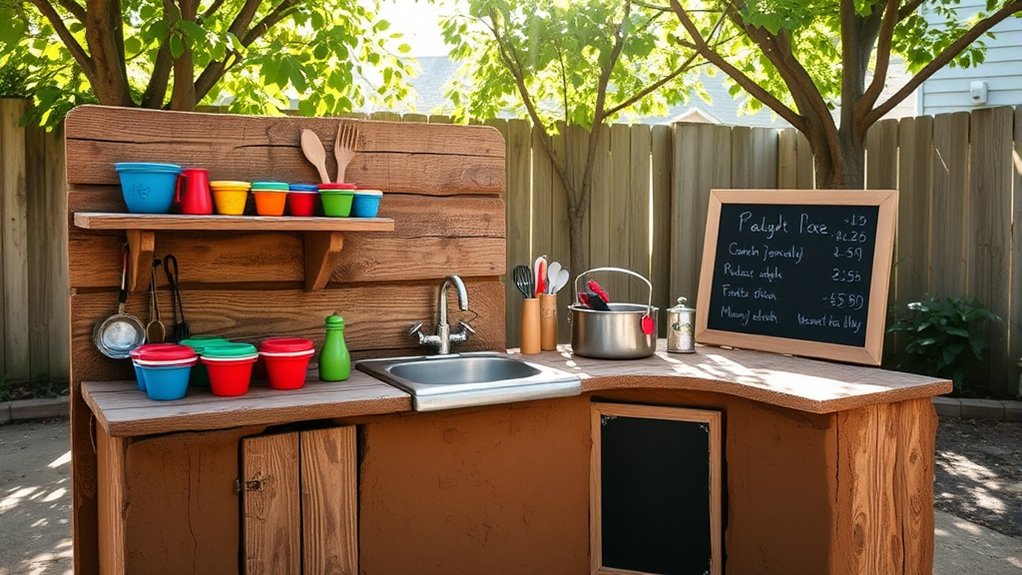
Building a mud kitchen encourages kids to tap into their creativity and think like little chefs and adventurers. As they mix, stir, and serve mud pies, they develop their imagination, transforming simple materials into endless culinary possibilities.
Your child might pretend they’re baking a cake or preparing a feast for friends, which fuels their storytelling skills. The open-ended nature of a mud kitchen invites experimentation and problem-solving, pushing their inventive boundaries.
Kids also role-play different characters, investigating social interactions and empathy. This imaginative play boosts confidence and emotional intelligence.
Choose the Best Location for Your DIY Mud Kitchen
When choosing a spot for your mud kitchen, make sure it’s accessible and safe for kids to use easily.
Think about the balance of sunlight and shade so it stays comfortable and dry, no matter the weather.
Keep it close to the play area to encourage spontaneous fun without long walks.
Accessibility and Safety
Choosing the right spot for your DIY mud kitchen is key to keeping it safe and accessible. Find a flat, stable surface away from busy paths or driveways to avoid accidents.
Make sure the area is easy for children of all ages and abilities to reach so they can access supplies comfortably. Keep the space free of sharp objects, low-hanging branches, or any hazards that could cause injuries.
Use the table below to help you evaluate potential locations:
| Criteria | Considerations |
|---|---|
| Accessibility | Easy for children to reach and use |
| Safety | Clear of hazards and obstacles |
| Surface | Flat, stable, non-slip surface |
| Proximity to water | Close enough for easy water access |
Prioritize these factors to create a safe and inviting play area.
Sunlight and Shade Balance
Ever wondered how the right balance of sunlight and shade can make or break your kid’s mud kitchen experience? Too much direct sun can make the area uncomfortably hot and cause materials to dry out quickly.
On the other hand, too much shade might make the space damp and less inviting for messy play. Aim for a spot that gets plenty of natural light but also offers shade during the hottest parts of the day, like late morning or early afternoon.
Consider natural shade from trees or plan to add a canopy or umbrella for flexibility. This balance guarantees your child stays comfortable, the mud stays moist longer, and the area remains inviting for creative play.
Proper sunlight and shade balance make the entire experience more enjoyable and practical.
Proximity to Play Area
The best spot for your DIY mud kitchen is close enough to the main play area so kids can easily reach it without having to go far. It should be nearby enough to encourage spontaneous play and make supervision easier.
But avoid putting it right in the middle of busy zones like swings or slides to prevent collisions or interference. A slightly tucked-away spot that’s still within sight works best.
A shaded corner or under a tree can be ideal, offering protection from direct sunlight. Keep pathways clear for easy movement and consider nearby storage for tools and materials.
The goal is a convenient, accessible spot that enhances play without causing chaos.
Gather Materials and Tools for Your Mud Kitchen
Gathering the right materials and tools is the first step to building a fun and functional mud kitchen. You’ll need basic supplies like wood planks, screws, and nails to put it together.
Assembling your mud kitchen begins with gathering essential supplies like wood, screws, and nails for a sturdy build.
A saw and screwdriver are essential for cutting and assembling the pieces. Consider using weather-resistant wood or paint so it stays durable outdoors.
You’ll also want buckets, spoons, and other child-friendly kitchen tools to make playtime more fun. If you’re adding a countertop, choose a sturdy surface like a repurposed table or a large flat board.
Don’t forget safety gear such as gloves and goggles to protect yourself while working. Having all your materials and tools ready before you start will make the building process smoother and more enjoyable.
Design a Kid-Friendly and Safe Mud Kitchen
Designing a kid-friendly and safe mud kitchen starts with prioritizing stability and smooth edges to prevent injuries. Make sure the structure is sturdy so it doesn’t wobble or tip over easily. Sand down any sharp corners or rough surfaces to avoid scratches or cuts. Use non-toxic, child-safe paints or finishes if you plan to add color or decoration.
To improve safety and fun, consider these points:
- Choose durable, weather-resistant materials that won’t break easily
- Incorporate rounded edges and smooth surfaces everywhere
- Keep the height accessible for kids, reducing the need for climbing or stretching
Focusing on these details helps create a safe, inviting space where kids can investigate and play freely.
Build the Frame of Your Mud Kitchen Step by Step
To build a sturdy frame for your mud kitchen, start by choosing the right materials like weather-resistant wood or plastic. Make sure they’re strong enough to support weight and handle outdoor conditions.
Measure and cut the pieces carefully to create a solid base structure. Assemble the frame using screws or nails, ensuring all joints are secure.
As you go, check for stability and make adjustments as needed. Remember, a sturdy frame is the foundation of a safe and fun play space.
Keep your children’s safety in mind and don’t rush the process. Here’s an emotional guide to inspire your effort:
| Feelings to Embrace | What It Means to You |
|---|---|
| Pride | Building with your own hands |
| Joy | Watching your kids play freely |
| Accomplishment | Creating a lasting outdoor space |
| Excitement | Seeing your vision come alive |
Add Fun Features: Shelves, Sinks, and Storage
Adding fun features like shelves, sinks, and storage transforms your mud kitchen into a more practical and exciting play space. These elements help kids organize their tools and ingredients while sparking their imagination.
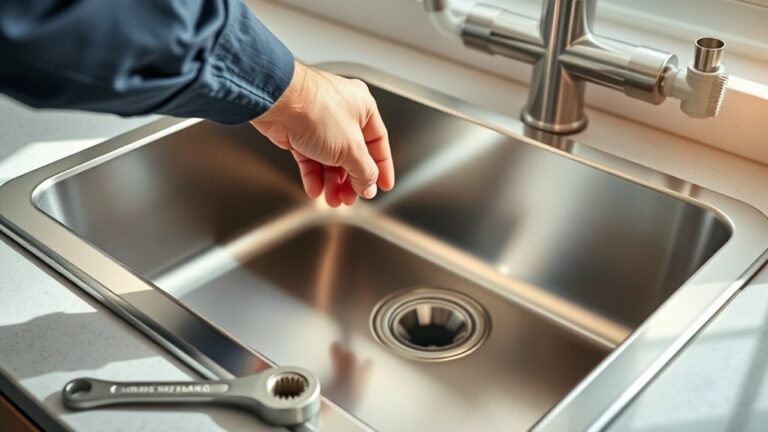
Installing a small shelf gives kids a place for utensils, cups, or pretend food. A DIY sink, made from a shallow basin or repurposed container, invites them to wash up after cooking adventures.
Storage options like hooks or small baskets keep everything tidy and easy to find. Consider adding a simple wooden shelf attached to the side of the kitchen, a shallow basin for water play, or hooks for utensils and tools.
These features boost the play value and teach kids about organization and responsibility in a fun way.
Decorate and Personalize Your Mud Kitchen
To make your mud kitchen uniquely yours, add colorful accessories that catch the eye and spark imagination. Bright, fun pieces can really make it stand out and invite kids to play.
Incorporate personal touches like painted signs or handmade details to make it feel special and welcoming. These little touches add charm and personality to the space.
You can also choose themed decorations that match your child’s favorite stories or interests. It’s a great way to make the kitchen even more fun and personalized.
Add Colorful Accessories
Brighten up your mud kitchen by adding colorful accessories that reflect your child’s personality and spark creativity. Bright colors and playful details make the space more inviting and inspire imaginative play.
Try incorporating small containers, utensils, or signs in vibrant hues to make everything pop. Use weather-resistant paint or waterproof stickers to ensure these accessories last.
These colorful touches not only make the kitchen more attractive but also encourage your child to engage more actively in their play. Brightly colored toy tools and utensils, fun signs or labels, and vibrant storage containers or baskets are great options to consider.
Incorporate Personal Touches
Personalizing your mud kitchen makes it even more special and inviting for your child. You can add personal touches that reflect their interests or favorite colors, making the space distinctly theirs.
Consider painting a name or fun designs on the outside, or attaching small chalkboards for drawing and notes. Incorporate items like personalized utensils, toy pots, or even kid-friendly signs that add character.
Using natural materials such as shells, stones, or handmade decorations can give it a cozy, homemade feel. Remember, the goal is to create a space where your child feels comfortable and excited to play.
These personal touches not only boost their imagination but also help foster a sense of ownership and pride in their outdoor play area.
Use Themed Decorations
Using themed decorations turns your mud kitchen into a fun, imaginative space that sparks your child’s creativity. You can pick a favorite color scheme, a fairy tale theme, or a farmyard vibe to make it uniquely theirs.
Try simple items like painted signs, themed utensils, or outdoor fairy lights to create an enchanting environment. Adding playful touches like chalkboard labels for “ingredients” or hanging banners can boost the charm.
These decorations encourage your child to get more involved in play, inspiring storytelling and role-playing. Remember, the goal is to make the space inviting and personal, so involve your little one in choosing decorations.
This makes your mud kitchen more special and exciting, and it helps your child feel a sense of ownership over their new play space.
Maintain and Clean Your Mud Kitchen for Safe Play
Regular maintenance and cleaning are key to keeping your mud kitchen safe and fun for kids. Make sure to check the structure regularly for any damage or loose parts, and fix things right away.
After each play session, remove mud and debris with a brush or damp cloth. Use mild soap and water to clean the surfaces, avoiding harsh chemicals that could harm children.
Rinse everything thoroughly and dry it to prevent mold and mildew. Also, check the drainage areas to ensure they’re clear and working properly.
Keep tools, utensils, and toys clean and sanitized. Every now and then, reseal or repaint wooden surfaces to protect them from weathering and rot.
Doing regular upkeep helps your mud kitchen stay a safe, hygienic, and inviting space for your kids’ imaginative play.
Incorporate Natural Elements for a More Engaging Play Space
After making sure your mud kitchen stays clean and safe, think about adding natural elements to make it more inviting. This can turn the space into a fun, immersive area for your kids to explore.
You can include natural items like stones and pebbles for texture and stacking play. Wooden branches or logs can serve as utensils or small play stations to inspire creativity.
Adding leaves, flowers, or herbs brings in color and a lovely aroma, encouraging sensory exploration. Using these elements connects the play space to nature and sparks imaginative play.
Natural materials are eco-friendly and durable, making them perfect for outdoor use. Just ensure everything is safe, clean, and free of sharp edges before introducing it to your child’s play area.
Troubleshoot Common Challenges When Building a Mud Kitchen
Building a mud kitchen can come with its share of challenges, but addressing common issues early on can save you time and frustration.
One common problem is water leakage or instability in the structure. To fix this, reinforce joints with strong adhesive or screws and make sure the base is level.
If mud doesn’t stay put or washes away easily, consider sealing the surfaces with a weatherproof sealant or lining the interior with waterproof materials.
Another challenge is safety; sharp edges or loose parts can be hazardous. Smooth out rough edges and securely attach all components.
Finally, if your setup isn’t weather-resistant, store it indoors during heavy rain or cover it with a waterproof tarp.
Frequently Asked Questions
How Can I Make the Mud Kitchen More Accessible for All Children?
You can make the mud kitchen more accessible by choosing a flat, stable surface that’s easy to reach from all children’s heights. Use adjustable or lower shelves so everything is within easy grasp.
Incorporate visual cues like bright colors or labels for easy identification. Make sure there’s enough space for children to move freely.
Include tools or utensils that are lightweight and easy to handle, accommodating children with different abilities.
What Eco-Friendly Materials Are Safest for a Children’s Mud Kitchen?
You should choose non-toxic, sustainably sourced materials like untreated wood, bamboo, or recycled plastic to guarantee safety and eco-friendliness.
Avoid treated woods or plastics with harmful chemicals, as kids might ingest or come into contact with these. Use natural paints or finishes that are low-VOC or zero-VOC to keep the environment and your child’s health safe.
These materials support sustainability and provide a safe, healthy play environment.
How Do I Ensure the Mud Kitchen Withstands Outdoor Weather Conditions?
To make sure your mud kitchen can handle outdoor weather, start by sealing the wood with an outdoor-grade sealant or waterproof paint. This helps protect it against moisture and rot.
Choose durable, weather-resistant materials like cedar or treated lumber to build your mud kitchen. These materials are better suited for outdoor conditions and will last longer.
Regularly check for any damage or wear. Touch up the sealant as needed to keep everything protected.
Think about placing your mud kitchen on a raised platform or under a shelter. This reduces exposure to rain and direct sunlight, helping it stay in good shape longer.
Can I Add Electrical Features Safely to the Mud Kitchen?
Yes, you can add electrical features safely to the mud kitchen if you take proper precautions. Use outdoor-rated, waterproof electrical components and make sure all wiring is protected from moisture.
Keep electrical outlets and switches away from water sources to prevent accidents. It’s a good idea to consult a qualified electrician for installation to ensure everything is safe.
How Can I Customize the Mud Kitchen for Different Age Groups?
Think of your mud kitchen as a blank canvas waiting for your creative touch. To customize it for different ages, add adjustable features like height-appropriate counters, versatile tools, and safety barriers for little adventurers.
For older kids, include more complex accessories like pretend appliances or storage solutions. You’re tailoring a playground of imagination, making sure each age group finds joy and challenge in their muddy adventures.
Conclusion
Building a mud kitchen sparks your child’s imagination and creates a fun, natural play space. With some planning, safety, and creativity, you can craft a magical area where little chefs investigate and learn.
Remember, “A stitch in time saves nine.” Taking the time to build it right guarantees lasting joy and safe play.
So, roll up your sleeves and enjoy the process. Your kid’s outdoor adventures are just a mud kitchen away!